1/10/2016

Progress on ATSF #1 rebuilt

Some progress to show on the bulldog nosed ATSF #1. Unit is placed on USA Trains' SD-40/2 trucks which have the correct wheelbase and will be used for this project.


12/31/2015

M-10005's B-unit with paint job finished

Finally the B-unit has received its paint, too


12/13/2015

A-unit assembled

Put together the A-unit - however, after some research I noticed that the lower red line is too thick so that area has to be re-painted.


12/11/2015

Painting M-10005's A-unit

Paint job on the A-unit is finished including the front logo and side badges - the shell's lettering is still missing


11/18/2015

M-10005: A-unit in the paint shop

Some pictures from the basic paint job on the A-unit and its trucks


Next step will be the red stripe dividing armour yellow and leaf brown
Additionally decals for the front and side badges have to be designed

10/11/2015

ATSF #2611 with basic paint job


Still missing upper silver lining, bell on roof (it was hard to discover on the prototype photos for #2611) and - of course - decals

10/02/2015

ATSF rebuilt 1-spot progress

Front area of the roof remodeled, pilot attached and side-skirt trimmed down.


9/25/2015

ATSF rebuilt 1-spot

Now after some progress a few photos of the first assembly steps (side skirt and roof not shaped now). Set-up is on Aristo's HW-trucks for demonstration purposes.


9/20/2015

Streamlined ATSF #10 or #1 in 1/29

Started with the first 'rebuilt' design of Amos & Andy - the streamlined bulldog-nose set-up with the cab on top of the nose.
There are slight differences in the bulldog-nose' shape between #1 and #10 the latter having a more slanted nose above the herald and a different window arrangement.
Up to now I'm not quite sure which unit I'll build...it depends a bit how the  bulldog-nose will emerge from the trials.

Once again, body and basic roof are from an Aristo-Craft HW.
The bulldog nose is quite a challenge - compound curves in every direction!

I haven't make up a final decision on truck arrangement - either the earlier 1B-B or the final 1B-1B version. Additionally I'm not sure whether I should use the A1A-trucks of USA-Trains as a substitute (actually a 1B, too). There are a few differences in appearance between the 1B (asymmetrical axle distance, about 14' 6" wheelbase) and the A1A (symmetrical axle distance, app. 15'6" wheelbase).
Pictures of first assembly will follow

9/15/2015

Update on ATSF #2611

Some progress on shell & roof


9/06/2015

Further progress on ATSF #2611

Installed the ventilation hatches on the roof, head and rear light and couplers.


8/29/2015

M-10005 - new pictures of the aux. power-baggage car

Some progress on the baggage car (trucks' sideframes started, most of the rivets on the body set etc.)


8/26/2015

Further progress on ATSF #2611

Window & door openings roughly cut and roof modified to asymmetrical design of front and rear


8/22/2015

ATSF #2611 - further progress

Basic pilot design and side skirting as well as roof shape were finished


8/12/2015

ATSF #2611 in1/29

Another project: ATSF #2611, a transfer unit rebuilt from one of the one-spots.

ATSF #2611

Body will - once again - consist of an Aristo-Craft HW. Shortened, with the HW's end slightly inclined.
Roof will be a bit more difficult due to the different intake grills on each end and sides as well as the two 'counter-sunk' exhaust/muffler arrangements (quite similar to those of the M-10005) and the several cooling intake hatches.

Trucks of an USA-Trains F3B will be used.

First pictures of the basic body & truck assembly (I have to admit, looking really strange & ugly). Body height seems to be rather small in comparison to the usual F-units and the trucks - however, it is according to the app. 6'10" listed in the drawing in 'Santa Fe early diesel daze'.


8/01/2015

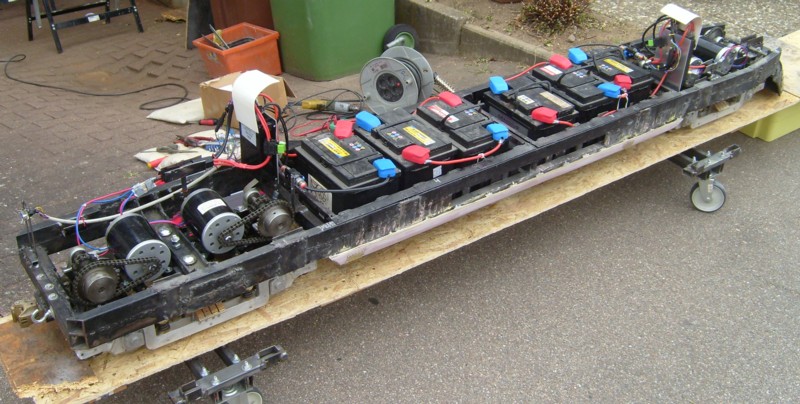
M-10005: electrical controlling system installed


Since I use four motors of app. 750W each (36V) I had the choice between two controlling systems:
- a single, very powerful controller with long wire harness to the motors and the two 36V-packes (12V batteries in serial connection)
- two smaller controllers one for each truck, connected in a master-slave set-up, with shorter wire harness and none of the problems of connecting two different 36V-packs

Well, after several months of consideration I decided to go with two controllers in a master slave set-up (4QD Pro-150).
The front truck is the slave, the rear the master controller which is connected to the controlling box (with ignition, forward/reverse-switch and speed
pot).
For safety I put several fuses into the harness (ignition, battery connection and to each motor) -  maybe overkill but this set-up may help to locate a problem or to ease limping back into the station.


7/24/2015

PRR #4663 out of the paint shop

Some pictures of the basic paint job


Next step will be lettering with decals


5/27/2015

PRR #4663 - more details

Now with doors, handrails etc. applied; front truck finally has been moved forward by 5/16"